Launch an NFT Collection
Launch your NFT collection on Raven House, a privacy-first platform on the Aztec Layer 2 blockchain (live on testnet). Using zero-knowledge proofs, mint, list, and transfer NFTs privately, keeping your wallet and NFT details confidential.
This guide walks you through launching a collection, from defining its details to deploying it on Aztec. Let’s bring your vision to life!
Video Guide
Watch our step-by-step video tutorial to see the launch process in action:
This video covers everything from setup to deployment, with tips for a successful launch.
Before You Start: Ensure you have an Aztec-compatible wallet like Azguard or Obsidion. Follow our Wallet Setup Guide to get started.
Step 1: Set Up Your Collection
Begin by defining your collection’s identity, traits, economics, and minting strategy on the Raven House platform.
1.1 Define Your Collection
Navigate to the Launch Collection page on Raven House. Enter the core details to establish your collection’s identity.
Example: Moonlit Guardians Collection
- Collection Name: Moonlit Guardians
- Collection Symbol: MOON (used in the smart contract; cannot be changed)
- Collection Image: A 800x800px PNG of a glowing wolf emblem
- Banner Image: A 1400x400px PNG of a mystical forest under moonlight
- Description: “Moonlit Guardians is a collection of 1,000 unique NFTs celebrating mythical creatures protecting ancient forests. Each NFT grants access to exclusive community events and lore-driven quests.”
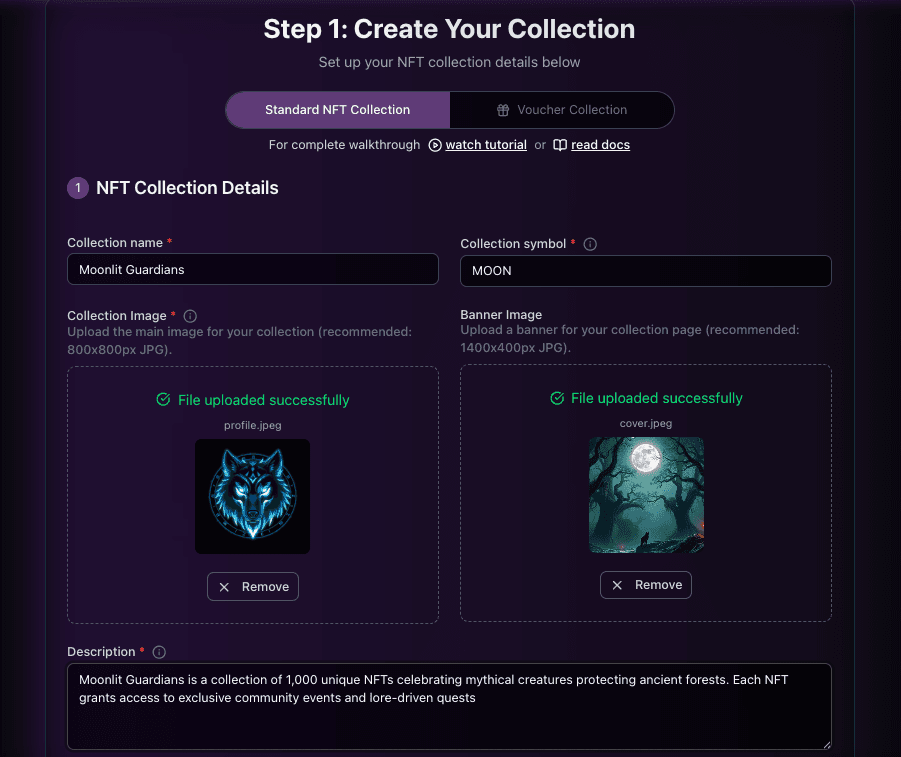
Use high-quality images and a compelling description to attract collectors.
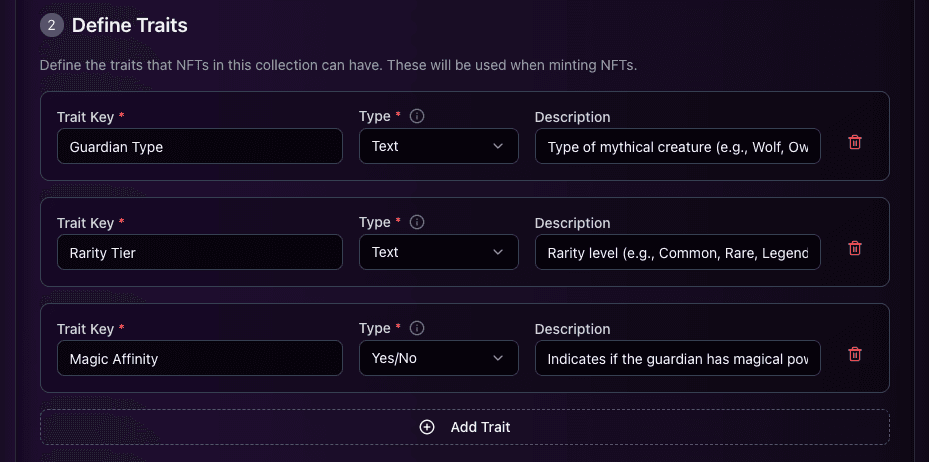
1.2 Configure NFT Traits
Define the traits that make each NFT unique. Traits are attributes like color, rarity, or type, which you’ll assign during asset upload.
Example Traits for Moonlit Guardians:
- Trait Key: Guardian Type
- Data Type: Text
- Description: Type of mythical creature (e.g., Wolf, Owl, Dragon)
- Trait Key: Rarity Tier
- Data Type: Text
- Description: Rarity level (e.g., Common, Rare, Legendary)
- Trait Key: Magic Affinity
- Data Type: Yes/No
- Description: Indicates if the guardian has magical powers
1.3 Set Economics and Supply
Configure the financial and supply rules for your collection.
Example Settings for Moonlit Guardians:
- Mint Price: 10 USDC per NFT
- Royalty Fee: 0 (will be supported in future versions)
- Max Supply: 1,000 NFTs (fixed supply for exclusivity)
- Mint Limit per Wallet: 5 NFTs to prevent oversaturation by single wallets
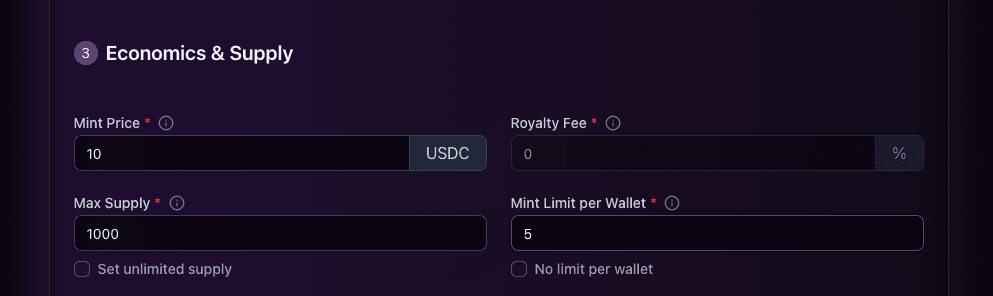
Balance mint price and supply to align with your project’s goals and target audience.
1.4 Plan Minting Stages
Control who can mint your NFTs and when by setting up public and whitelisted minting stages.
Enable Public Minting
- Toggle On: Allows both public and whitelisted minting stages (flexible strategies).
- Toggle Off: Restricts minting to whitelisted addresses only.

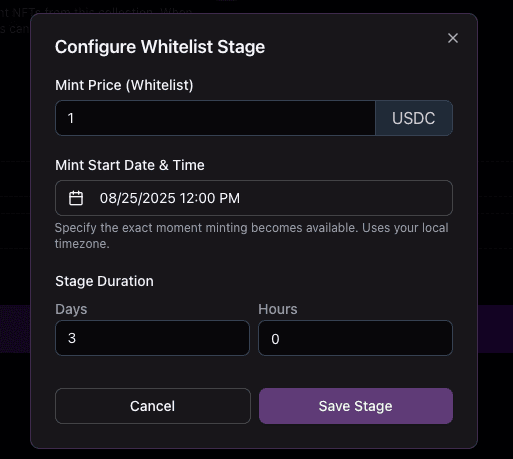
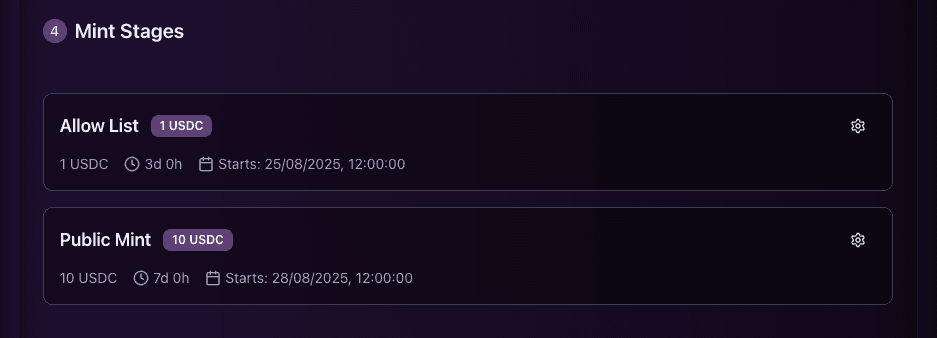
Add Whitelist Stages
Click Add Whitelist Stage to configure:
- Mint Price: 1 USDC (discount for whitelisted users)
- Start Date & Time: Aug 25, 2025, 12:00 PM UTC
- Duration: 3 days
- Example: Early supporters of Moonlit Guardians get a discounted mint price.
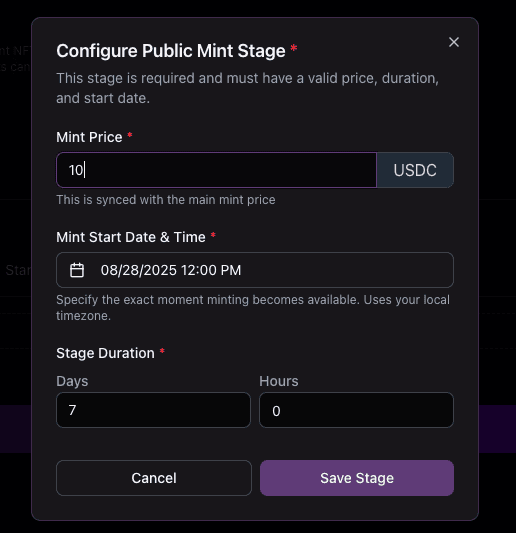
Add Public Mint Stages
Click Add Public Mint Stage to configure:
- Mint Price: 10 USDC
- Start Date & Time: Aug 28, 2025, 12:00 PM UTC
- Duration: 7 days
- Example: General collectors can mint Moonlit Guardians after the whitelist phase.
Minting Strategies
- Early Access: Whitelist stage (Aug 25–27) followed by public stage (Aug 28– Sept 3).
- Price Advantage: Whitelist at 1 USDC, public at 10 USDC, running concurrently.
- Sequential Phases: Whitelist only (Days 1–3), then public only (Days 4–10).
Schedule stages to align with your community’s time zones and marketing campaigns. Learn more about Whitelist Management.
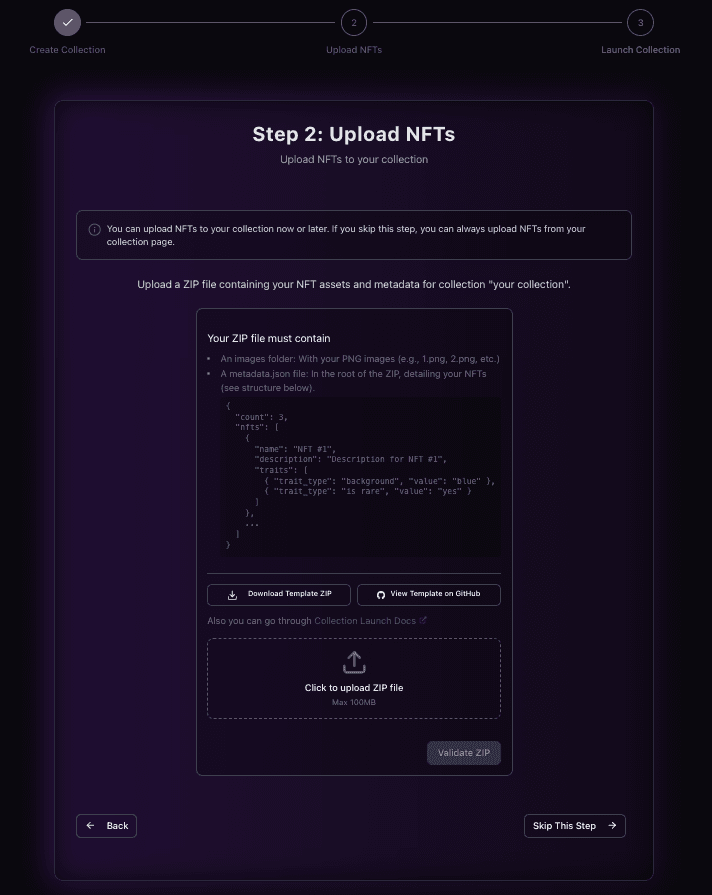
Step 2: Upload Assets
Upload your NFT images and metadata to bring your collection to life.
-
Prepare Your Assets:
- Create a ZIP file containing:
- PNG images for each NFT (e.g.,
1.png,2.pngfor Moonlit Guardians’ wolf and owl designs). - A
metadata.jsonfile mapping each NFT to its traits (e.g.,{ "1": { "Guardian Type": "Wolf", "Rarity Tier": "Rare", "Magic Affinity": true } }).
- PNG images for each NFT (e.g.,
- Download our Sample ZIP Template for the correct structure.
- Create a ZIP file containing:
-
Upload the ZIP:
- On the Launch Collection page, click to upload your ZIP file.
- Raven House validates the file to ensure traits match your Step 1 definitions.
-
Confirm Upload:
- Once validated, you’ll see a success message. Your NFTs are now linked to your collection, ready for minting.
Tip: Test your ZIP file with a small batch (e.g., 10 NFTs) to catch errors before uploading the full collection.
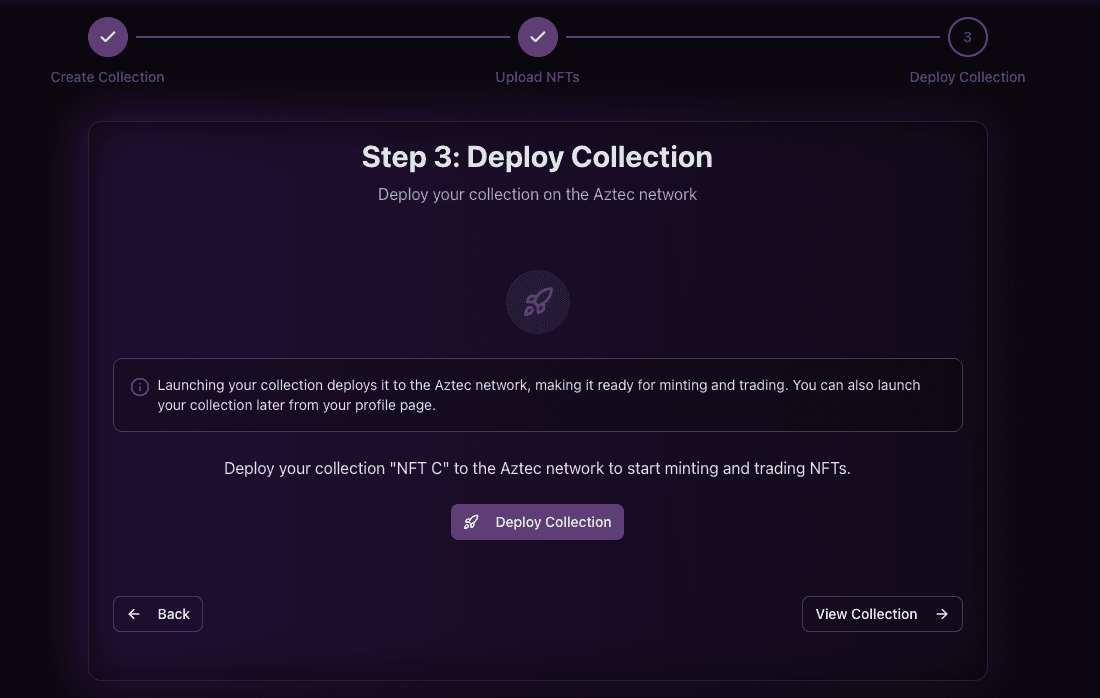
Step 3: Deploy and Manage
Deploy your collection to the Aztec testnet and manage it post-launch.
3.1 Deploy Your Collection
- On the Launch Collection page, review your settings (name, traits, economics, stages).
- Click Deploy Collection to deploy the smart contract to Aztec.
- A confirmation pop-up summarizes your settings. Double-check, as deployment is irreversible.
Tip: Ensure your Azguard or Obsidion wallet is connected and funded with testnet tokens.
3.2 Manage Post-Launch
- Whitelist Management: Add wallet addresses and enable the whitelist for your stages. See Whitelist Management Guide.
- Monitor Minting: Track mint progress and adjust stages if needed.
- Engage Community: Use Raven House’s Discord bot to assign roles to NFT holders and share trading updates.
Tips for Success
Planning Your Launch
- Time Zones: Schedule mint stages for your audience’s primary time zones (e.g., UTC for global reach).
- Marketing: Announce your Moonlit Guardians launch on Discord and X to build hype.
- Buffer Time: Allow a 1–2 day buffer for technical issues during minting.
Troubleshooting
- ZIP Validation Errors: Verify your
metadata.jsonmatches the trait structure defined in Step 1. - Deployment Fails: Check wallet connection and testnet token balance in Azguard/Obsidion.
- Whitelist Issues: Ensure whitelist is enabled and addresses are correctly added.
- Need Help? Join our Discord community or contact support via the Raven House platform.
Ready to launch your collection? Start on Raven House →